Our Process
Our Flooring Process for GA Clients
Concrete floors can have more personality and visual appeal than a plain gray slab. With Fortress Floors GA’s highly effective flooring process available to Coastal Empire homeowners, a colorful, durable, and slip-resistant surface is within easy reach. We strive to make the entire experience as pleasant and convenient as possible. To achieve this, we typically finish your new floor coating in one day using high-quality products and equipment. You get a stunning new surface with minimal impact on your daily life at the area’s best prices for this service.
Preparing Your Concrete Floor for Coating
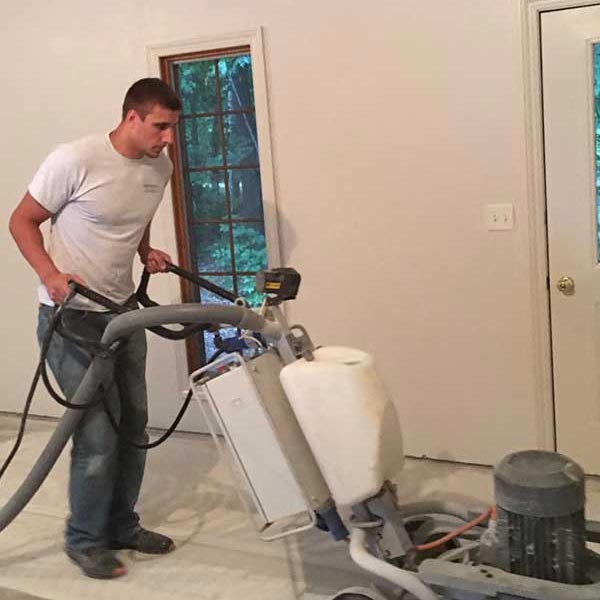
Grinding the concrete surface is essential for many reasons to prepare it for our floor covering. It removes weak or deteriorated concrete and creates a coarse and porous surface. Concrete is prone to absorbing oil, gasoline, grease, and other spilled contaminants, but grinding typically removes these from the surface. The layer formed over concrete during the original curing is called the latent layer. It has minimal pores and is the weakest layer. Removing this layer is a vital part of Fortress Floors GA’s team preparing concrete for coating, which grinding takes care of quickly and efficiently.
Steps of the Installation Process
The installation process has six simple steps our team follows to produce beautiful and durable results in one day. Below are the summarized steps to give you a better understanding of what your new floor coating entails:

We prep your concrete area by grinding its surface to put a scratch pattern on your floor. This pattern provides exceptional adhesion to the polyurea coating. We minimize dust during the process using specialized vacuums attached to the grinder.

The next step is letting our team of menders and fillers fix all cracks and pits on your concrete's surface. The floor must be fully restored before we can begin the application process.

After fixing the cracks and pits, our team mixes and applies a self-priming basecoat made with pure polyurea.

Once the basecoat has been applied, we evenly distribute the chip material by hand over the floor’s surface. This material gives your floor covering color and texture.

The floor undergoes a curing period, and after that, we scrape and vacuum the floor to remove any loose or vertical-standing flakes to ensure a smooth finish.

Our team finishes the application process by rolling out a polyaspartic clear coat over the top, sealing the coating in place. This clear coat is ultraviolet (UV)-stable, making it ideal for indoor and outdoor use.